Naturally Beautiful Easter Eggs: How to Dye Easter Eggs with Onions
There’s something extra special about going back to simple, natural traditions during the Easter season. If you’re looking for a creative, chemical-free way to decorate eggs this year, dye Easter eggs naturally with onion skins to create the most stunning earthy tones, rich golds, deep ambers, and soft marbled browns. Paired with fresh herbs, each egg turns into a tiny piece of art. This natural dye method is inspired by Maja’s Recipes, and I absolutely loved making them!
Let’s walk through how to make your own naturally dyed Easter eggs using ingredients you probably already have in your kitchen.
Ingredients
- White eggs (Raw)
- Onion skins (yellow and red)
- White vinegar
- Fresh herbs (parsley, sage, dill, or any other herbs you’d like to use)
- Nylon stocking
Directions
Step 1: Prep Your Eggs
Start by washing your eggs thoroughly to remove any residue. This helps the dye stick evenly and gives you the best color results.
*Note: Do not boil the eggs before placing the herbs and nylon on. The herbs stick better when raw and you will boil them in later steps!
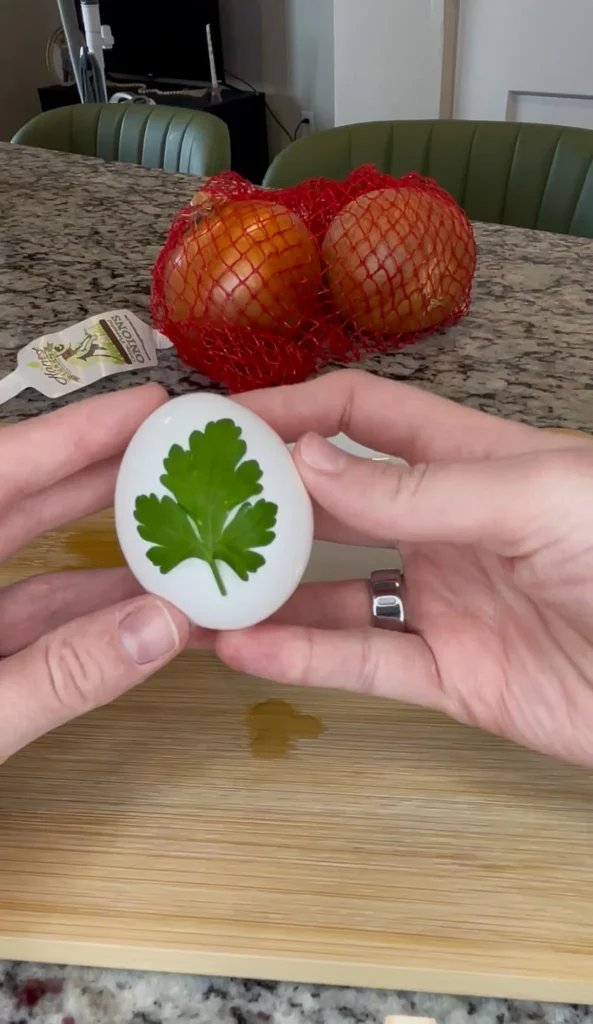
Step 2: Add Your Botanical Designs
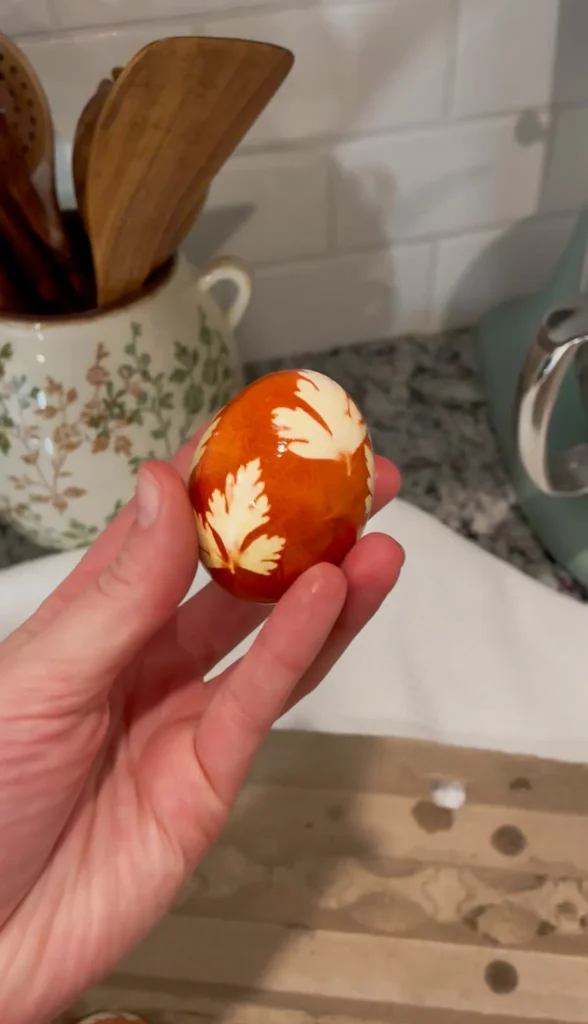
Lightly press a small herb or leaf onto each egg. Dipping the herb into a bowl of water helps it stick in place. This will create a beautiful natural print once dyed.
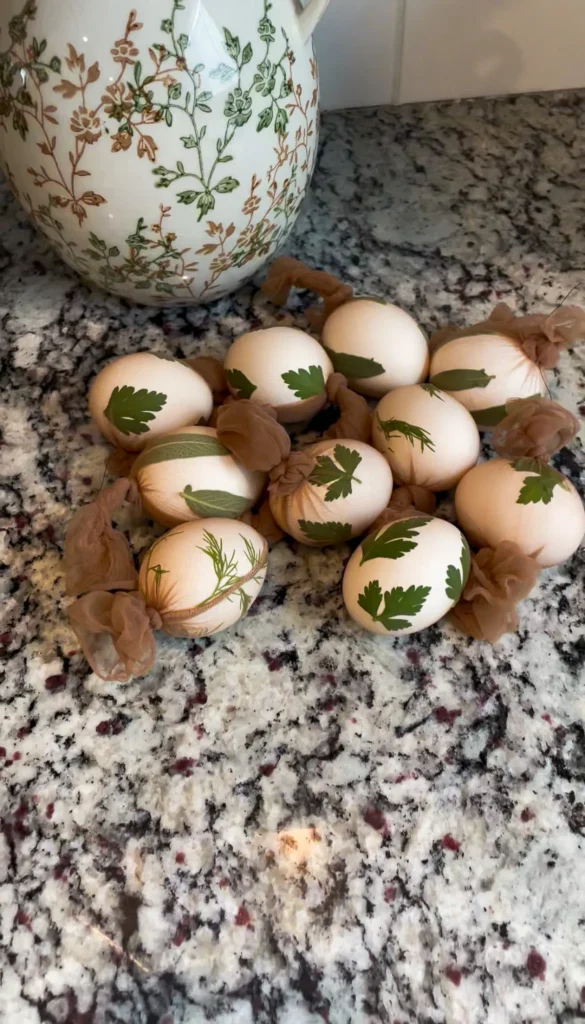
Step 3: Wrap for Dyeing
Place each egg into a cut piece of nylon stocking to dye Easter eggs with onions. Pull it tight so the herb stays firmly in place, then secure it with a knot or thread. I found it easiest to use the nylon itself to tie it off, but if you have a smaller cut piece of nylon, a piece of thread can come in handy. The tighter the wrap, the crisper your design will be.
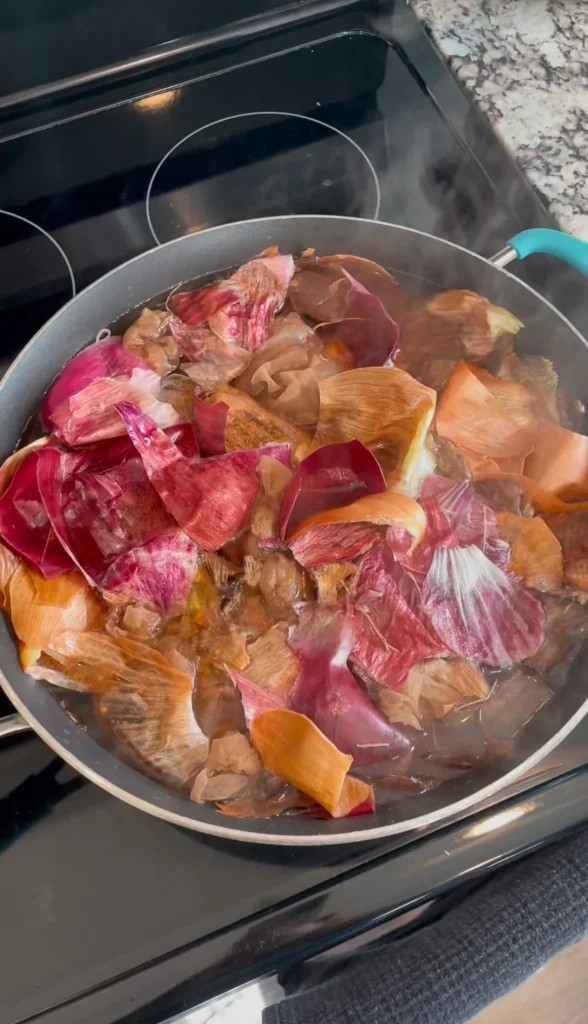
Step 4: Create Your Natural Dye Bath
Line a large pot with onion skins and gently place your wrapped eggs on top. The more onion skins, the deeper the color will be. To dye Easter eggs with onions, add enough water to fully cover the eggs, then stir in a splash of white vinegar to help set the color.
Step 5: Simmer and Soak
Bring the pot to a boil, then reduce the heat and let it simmer for about 10 minutes. After that, remove from heat, cover, and allow the eggs to sit in the dye for another 30 minutes to deepen the color, or longer depending on how deep you want the colors to be.
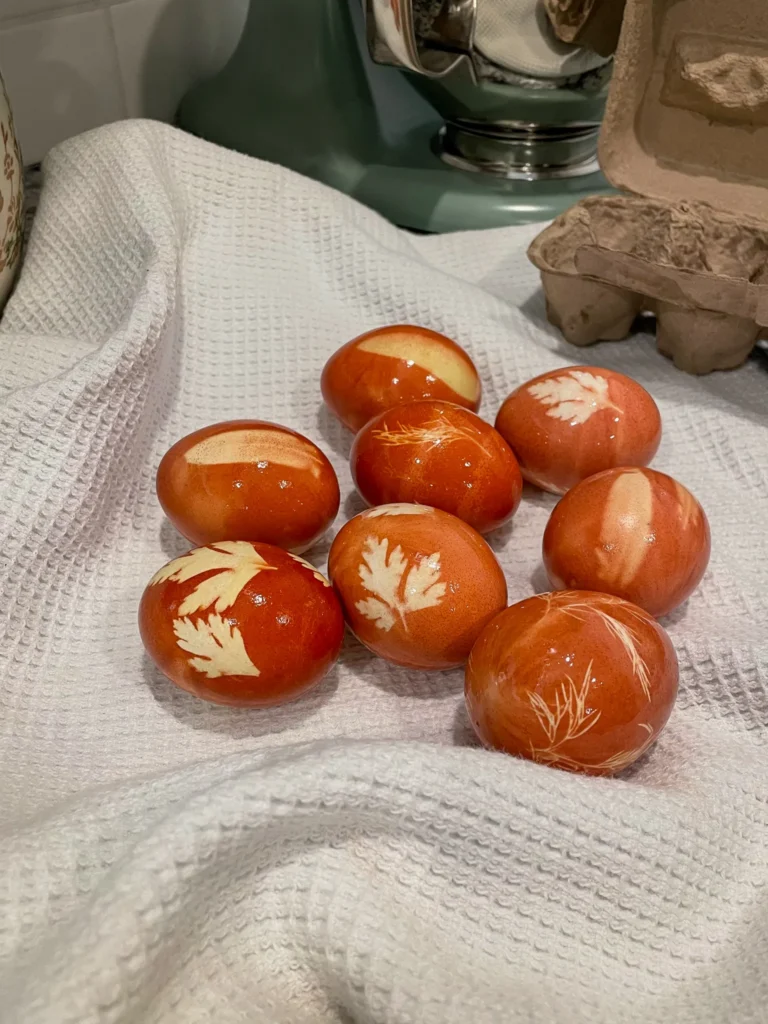
Step 6: Reveal Your Designs
Carefully remove the eggs and let them cool slightly. Cut away the stocking and peel off the herbs to reveal your beautiful patterns. For a finishing touch, gently rub each egg with a little oil to enhance the color and give them a soft, natural shine.
Substitutes
- White Eggs: You can also use brown eggs, though the final colors may turn out a bit different.
- Onion Skins: Try red cabbage for a purple tone or beetroot skins for a soft pink hue.
- White Vinegar: Apple cider vinegar or even a bit of lemon juice will work just as well.
- Fresh Herbs: If you don’t have fresh herbs, dried flowers (like lavender) or leaves such as oak or maple can create beautiful patterns.
- Oil: Any light oil, like coconut or vegetable oil, can be used to give the eggs a subtle shine.
Original inspiration: Maja’s Recipes